

How To Install 3 Piece Cranks
Aug 09, 2022 / Creepo Service
This article volition hash out the installation and service of the BMX three piece crankset using the 48 spline spindle. These models of cranksets utilise cartridge bearing cups, a spindle with 48 pocket-size splines, a chainring and two artillery.
ane
Getting Started

There are several types of bottom bracket standards for BMX and Freestyle bikes. The large unthreaded bottom bracket is the "one-piece" or "ashtabula" bottom subclass. The threaded bottom bracket is referred to as the "euro" bottom bracket. The threading is the i.37″ x 24 TPI standard, the aforementioned as most route and mount bikes. In the euro standards there are ii mutual shell widths: 68mm and 73mm.
The euro threaded cups volition be in a left-hand and right hand threading. The left side thread of the bike is a correct-mitt management thread, which tightens clockwise and removes counter-clockwise. The right side of the bicycle is a left-hand thread, which tightens counter-clockwise and removes clockwise.
2
Installation
- Prepare the threads with grease or anti-seize. Install 1 cup and secure fully.
- Install spacer (if any) into shell. Hold spacer in place with spindle place and thread on other loving cup (Effigy ii). Secure cup. Bearing cups are designed to load against inner sleeve, only not printing against it so much it binds bearings. Some frame facing may be required.
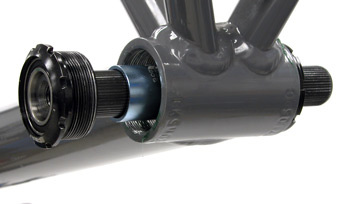
Figure 2. Install spindle, sleeve and loving cup
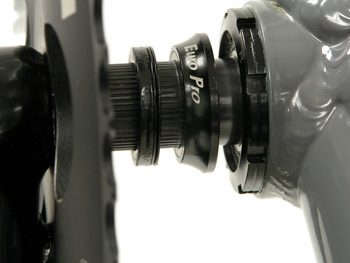
Figure 3. Utilize spacing washers to adjust chainline
- Install bearing cup cover cap and spacing washers on drive side arm. Spacing washers are used to adjust chainline of front band to rear cog (Figure 3).
- Grease inner splines of right arm and install on spindle. Install commodities and pull tight (Figure iv). Spindle will be pulled into arm.
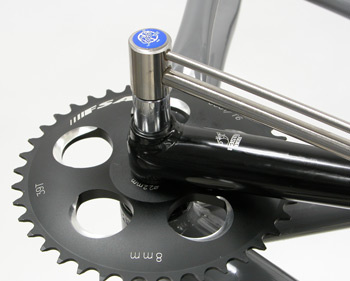
Figure 4. Pull spindle into crank
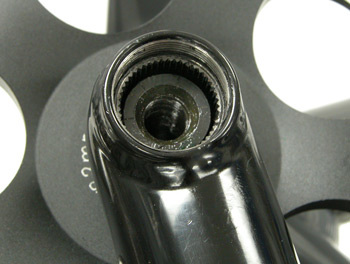
Effigy 5. Bank check fit of spindle in arm
- Go along to tighten until spindle fills at least one half of space available in arm (Figure 5). Remove bolt to check spindle to arm fit.
- Grease splines of left arm. Apply spacing washers to set arm symmetrically to right arm. This will take some trial and mistake, adding or removing spacers as necessary. Install arm and pull arm until it fully contacts spacing washers and bearing cap (Figure 6).
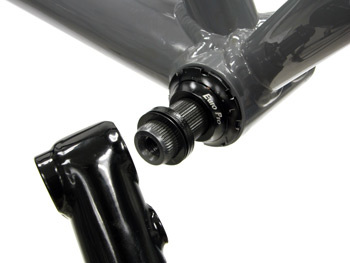
Figure half-dozen. Install and space left arm
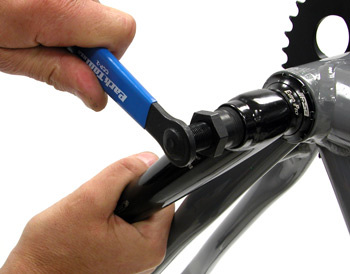
Effigy seven
- Cranks can be pulled on some makes and models using a crank puller such as the CCP-22 or CWP-vii (Figure 7). If the crank bolt is the common 8mm, use the same puller as for square type spindles. However, some makes us a proprietary puller or a mallet.
- Subsequently setting arm spacing, check that crank turns relatively smoothly and at that place is no side to side motion. If the artillery do not plow smoothly, the inner spacer between the bearing cups may exist too curt. If there is side to side motion in artillery, pull arms further onto spindle, and or add another spacing washer.

Source: https://www.parktool.com/blog/repair-help/bmx-three-piece-crank-service
Posted by: gonzalescreeidell.blogspot.com
0 Response to "How To Install 3 Piece Cranks"
Post a Comment